Sunday, January 31, 2010

Menu Plan for February 1, 2010


Time is just flying by lately. I strongly suspect that's because Baby's second birthday is rapidly approaching. I can't believe he'll be two in just a few short weeks. At the same time, I'm excited to see him growing up and learning new things. It makes me so proud when he figures out how to put words together or how to do something that used to challenge him. All the same, I long for the days when I could just hold him and rock him and he wouldn't say, "Mommy, no!"

Speaking of no, food has become a serious challenge these days. For those of you wondering how often Baby eats these wonderful varied things I put in front of him, the answer is not very often, especially these days. He suddenly has a thing against straight spaghetti - I think maybe it's a little challenging for him to eat it, so he'd rather not. He'd rather eat Spaghetti-O's or fusilli or another shaped pasta. He also will randomly decide to despise his favorite foods. I try my best to keep my cool about it, because I know my getting frustrated won't help the situation, but it's ridiculously hard sometimes. And I'm sure it's only going to get harder as he gets more opinionated.

I'm really excited to try this cider braised pork chop recipe this weekend - I've been wanting to try it for a while and I keep forgetting about it. I love apple flavors with pork chops, so I suspect that will be a pretty yummy dinner. And Baby will probably refuse to it, of course...so the saga continues.

Monday - Brinner! Buttermilk Waffles
Wednesday - Meatloaf and Mashed Potatoes
Thursday - Spaghetti and Garlic Knots
Friday - Honey Soy Chicken and Rice
Saturday - Cider Braised Pork Chops and Mashed Potatoes (a new recipe!)
Sunday - Beer and Brown Sugar Marinated Steak and Roasted Potatoes (Life got in the way last week so we didn't have this last week, and darn it, I was upset about it! I love this steak recipe!)

Have a great week, and don't forget to visit Org Junkie if you need any menu inspiration, or if you want to share your menu too!

Thursday, January 28, 2010

Simple Tomato Sauce with Onion and Butter (and Garlic)

Sometimes, I'm a total follower when it comes to recipes - if I see a million bloggers blog about a recipe, I figure they can't be wrong. Sometimes, they are. This time, not so much. I've seen this recipe on several different blogs, most recently being Smitten Kitchen, one of my personal faves. This sauce has been raved about by many a blogger, and I must say, there's good reason. This sauce is ridiculously simple, and still very flavorful. Husband thought something was missing, but I think what he was talking about were the additional spices you're used to in a tomato sauce.

This was the first time I've ever made tomato sauce for pasta, and I must say, outside of the mess it created (splatters everywhere!), I definitely enjoyed the process, and will be trying again with another sauce soon.

You must make this sauce. Soon. It's so easy that anyone can do it, and it tastes wonderful.

On a side note, today is my blogoversary - I can't believe I've been blogging for a year! It's certainly flown by quickly - it just blows my mind that I've been doing this for a year already. I just want to thank all of you who read my blog, I appreciate the comments you leave and the support you give me every day. Thank you all!


Tomato Sauce with Butter and Onion
adapted from Smitten Kitchen and Marcella Hazan
Printer-friendly recipe

1 28-oz can whole peeled tomatoes, with their juices (use high quality ones like Muir Glen or San Marzano)
5 Tbsp. unsalted butter
1 medium yellow onion, peeled and cut in half
2 cloves garlic, peeled and smashed but not chopped
Pinch of sugar
Pinch of salt

1. Combine the tomatoes, their juices, the butter, the garlic and the onion halves in a medium saucepan. Add a pinch or two of salt and sugar. Place over medium heat and bring to a simmer. Stir occasionally, mashing tomatoes with the back of a wooden spoon. Cook, uncovered, at a very slow but steady simmer, adjusting the heat as necessary, for about 45 minutes, or until droplets of fat float free from the tomato.
2. Remove onion and discard. Blend tomatoes and in a food processor or blender, in batches if necessary, until smooth. Return sauce to pan and simmer until the thickness of the sauce is to your liking.
3. Taste and salt as needed.

Makes enough sauce for about 1 pound of pasta, or 4 servings

Wednesday, January 27, 2010

Mom's Banana Bread

Personally, I'm not a fan of banana bread. Most people love it. I'm not most people, especially when it comes to food. I'll eat an occasional banana, but put some bananas in a bread, and I'm just not interested. Sure, it smells good when it's baking, but there's something terribly unappealing about banana bread to me. Enough about my weird opinion of banana bread...

Husband, on the other hand, is a huge fan. Particularly if you warm up a slice and top it with some vanilla ice cream. He tells me that this is some truly awesome banana bread - and I will just take his word for it!

This is my mom's recipe, which she's been making just about all of her life, though the whole-wheat flour is a substitution I made. I think a little bit of whole wheat flour makes things taste heartier, which makes sense for banana bread. It's a very simple recipe, and I'll bet you've got most of the ingredients in your pantry right now! Happy baking!


Mom's Banana Bread

1 stick butter
1 1/2 cups all-purpose flour
1/2 cup whole wheat flour
1 teaspoon salt
1 1/2 teaspoons baking powder
3/4 cup sugar
2 eggs
3 very ripe bananas, mashed
1 teaspoon vanilla extract

1. Oven preheated to 350 F, grease a 9x5" loaf pan.
2. Mix together the dry ingredients in one bowl and cream the butter in another. Beat the eggs and bananas into the butter, then stir this mixture into the dry ingredients. Finally, stir in the vanilla.
3. Pour the batter into the prepared pan and bake for around 1 hour, but start checking earlier at about 45 minutes, until it passes the toothpick test.
4. Let cool in pan for at least 15-20 minutes, then take loaf out of pan. (I usually let the loaf fully cool before I take it out, but that's just because I usually forget!)

Tuesday, January 26, 2010

What's on My Nightstand: January


It's been a busy reading month this month, thanks to lots of good finds at the library. But the best thing I read all month, by far, was "The Help," which I re-read for my book club's meeting next month. I swear, that's the one book I tell people about these days, when people ask me for a book recommendation. It's such an amazing book. If you haven't read it, go to Amazon right now (because it's ridiculously cheap there for a hardback at $9.50), and buy it. You will thank me, I swear.

What I finished off this month:
1. Plan B: A Novel by Jonathan Tropper
2. Juliet, Naked: a novel by Nick Hornby
3. Twenties Girl: A Novel by Sophie Kinsella
4. Mrs. Astor Regrets by Meryl Gordon
6. Gourmet Today cookbook
9. The Help by Kathryn Stockett (again - a re-read for next month's Book Club meeting)

What I plan to read next month:
2. How to Talk to a Widower: A Novel by Jonathan Tropper
3. Roses by Leila Meacham
4. The Piano Teacher: A Novel by Janice Y.K. Lee

Monday, January 25, 2010

Hershey's Best Brownies

I like brownies. A lot. So much that I have at least 5 different brownie recipes that I alternate and make pretty frequently. Now I'm going to have to add one to this! These were awesome. I brought these to a moms' meeting I went to, and they were devoured. Husband even had one and loved it, and he's not a huge fan of all things chocolate. These were also super easy to make, so I highly recommend them. Big chocolate taste, fudgy texture, and frosting - you just can't go wrong with these brownies!! Seriously, you can slap chocolate frosting on just about anything and it will taste awesome.


Hershey’s Best Brownies
Printer-friendly recipe

Ingredients:
1/2 cup (1 stick) butter or margarine, melted
1 cup sugar
1 teaspoon vanilla extract
2 eggs
1/2 cup all-purpose flour
1/3 cup HERSHEY'S Cocoa
1/4 teaspoon baking powder
1/4 teaspoon salt
1/2 cup chopped nuts(optional)
CREAMY BROWNIE FROSTING(recipe follows)

Directions:
1. Heat oven to 350°F. Grease 9-inch square baking pan. Or, make an aluminum foil sling for your pan, and grease that (makes frosting and cutting the brownies a little easier).
2. Stir together butter, sugar and vanilla in bowl. Add eggs; beat well with spoon. Stir together flour, cocoa, baking powder and salt; gradually add to egg mixture, beating until well blended. Stir in nuts, if desired. Spread batter evenly in prepared pan.
3. Bake 20 to 25 minutes or until brownies begin to pull away from sides of pan. Cool completely in pan on wire rack. Prepare CREAMY BROWNIE FROSTING; spread over brownies. Cut into squares. About 16 brownies.

CREAMY BROWNIE FROSTING
3 tablespoons butter or margarine, softened
3 tablespoons HERSHEY'S Cocoa
1 tablespoon light corn syrup or honey
1/2 teaspoon vanilla extract
1 cup powdered sugar
1 to 2 tablespoons milk

Beat butter, cocoa, corn syrup and vanilla in small bowl until blended. Add powdered sugar and milk; beat to spreading consistency. About 1 cup frosting.

Sunday, January 24, 2010

Menu Plan Monday for January 25th

I've got some great new recipes coming your way this week, including my very first spaghetti sauce, which was quite delicious and extremely simple to make. I've also got some brownies coming your way, which are insanely yummy. I'm looking forward especially to making my beer and brown sugar marinated steak again, because that was so awesome the last time I made it. Super duper yum.

Monday - Brinner - IHOP Pancakes
Wednesday - Spaghetti and Garlic Knots
Thursday - Mom's Pork Chops (I will be sharing this recipe, though it's not new!)

What's on your menu this week? Do you need some additional inspiration? Visit OrgJunkie to find many, many more menu plans from bloggers all over the blogosphere!

Friday, January 22, 2010

Vanilla Buttermilk Cake

This was my first triple-layer cake, and honestly, I don't know that I'd do another one. One piece of a two-layer cake is heaven, but one piece of a three-layer cake was a bit much, even for me.

As you may remember, I'm on the hunt for the perfect yellow cake, and had heard that this one might just be it. It comes from the famed Sky High: Irresistible Triple-Layer Cakes cookbook, which I've heard nothing but wonderful things about, so I was really excited to give this recipe a try. I'll tell you this much - it definitely looked beautiful, but it didn't taste as awesome as I wanted it to.
The cake was a bit dry for my taste, though it was still tasty - I am looking for the perfectly moist, buttery, yellow cake to make for Baby's birthday next month. This, unfortunately, was not it. It was, however, a super cake and was a big hit at a recent dinner party I had. The frosting was not as awesome as I'd hoped for, either, now that I think about it, I've definitely had better fudge frosting, but this one sure did pipe pretty.

**UPDATE: I'm such a tool. I totally did make a three-layer cake before this one. The now-infamous Tiramisu Cake I made for Husband's birthday was my first three-layer cake. That tasted way better than this one.

Vanilla Buttermilk Cake
from Sky High, Irresistible Triple Layer Cakes by Alisa Huntsman and Peter Wynne

4 whole eggs
2 egg yolks
2 teaspoons vanilla extract
1 1/4 cups buttermilk
3 cups cake flour
2 cups sugar
4 1/2 teaspoons baking powder
1/2 teaspoon salt
2 sticks (8 ounces) unsalted butter, at room temperature

1. Preheat the oven to 350 degrees F. Butter the bottoms and sides of three 8-inch round cake pans or spray to coat with vegetable oil. Line the bottom of each pan with a round of parchment or waxed paper and grease the paper.
2. Put the eggs and yolks in a medium mixing bowl, add the vanilla and 1/4 cup of the buttermilk. Whisk to blend well.
3.. Combine the flour, sugar, baking powder, and salt in a large mixer bowl; whisk to blend. Add the butter and the remaining 1 cup buttermilk to these dry ingredients and with the mixer on low, blend together. Raise the mixer speed to medium and beat until light and fluffy, about 2 minutes.
4. Add the egg mixture in 3 additions, scraping down the sides of the bowl and mixing only until thoroughly incorporated. Divide the batter among the 3 prepared pans.
5. Bake the cake layers for 28-32 minutes, or until a cake tester or wooden toothpick inserted in the center comes out clean and the cake begins to pull away from the sides of the pan. Let the layers cool in the pans for 10 minutes; then carefully turn out onto wire racks, peel off the paper liners, and let cool completely.
6. To assemble the cake, place one layer, flat side up, on a cake stand or serving plate. Spread 3/4 cup of the frosting over the layer, right to the edge. Repeat with the next layer. Place the last layer on top and use all but 3/4 cup of the frosting to cover the top and sides of the cake. With an offset spatula, smooth out the frosting all over. Place the remaining frosting in a pastry bag fitted with a medium star tip and pipe a shell border around the top and bottom edges of the cake.

Instant Fudge Frosting
makes 5 cups

6 ounces unsweetened chocolate, melted and cooled
4 1/2 cups confectioners' sugar
3 sticks (12 ounces) unsalted butter, at room temperature
6 tablespoons half-and-half
1 tablespoon vanilla extract

1. Place all of the ingredients in a food processor and pulse to incorporate. Then process until the frosting is smooth.

Thursday, January 21, 2010

Mama Kat's Writers' Workshop: Too Many Homes to Count

This week for Mama Kat's Writers' Workshop, I chose to write about the houses I lived in growing up. Want to read more writers? Visit Mama Kat and check out the linky we all participate in.


We moved a lot when I was little. Money was a bit of a challenge, and in my lifetime, my parents never owned a home. We rented various houses all around Sarasota, Florida, after moving there shortly before I turned 4. Prior to that, we lived in Iowa and Illinois, though I don't remember it in the least. If I remember correctly, I lived in three houses up north before we moved to Florida.

The way I remember it, we lived in no less than six different homes while I was growing up, one of which we lived in for over eight years. Prior to that, though, we moved around practically yearly, and I remember hating that a lot. It was hard to make friends with kids in my neighborhood because we moved so often, I stopped trying after a while because I knew we'd just move. I knew at a young age that money was tight and that we moved around a lot because of it. We never talked about money, not as a family, but I would overhear my parents sometimes and I also was pretty observant. I could tell by the kind of house we were living in as to how we were doing financially.

In one house in particular, I remember my sister's room as a converted one-car garage and my bedroom as the size of a shoebox. The house was ridiculously small for a family of 4, and it was awfully ratty. My mother was positively horrified that year because we inadvertently wound up hosting her boss and his wife for Thanksgiving dinner. She had been bragging about how wonderful our Thanksgiving dinners were, and he kind of invited himself and wouldn't take no for an answer. My mother was so embarrassed to have people over in that house. I remember we had lots of bug problems in that house, but there was one serious saving grace in that house. It had a small playground in the back. It was old, it was rusty, but it was fun. I was seven or eight when we lived there, and I just loved climbing around that little playground.

We moved into the house that I consider my childhood home at the end of elementary school. I managed, despite all the odds, to make a very good friend who lived down the street from me. I really liked that house. It was comfortable for us, and I often still drive by it when I visit my mother in Sarasota, even though she doesn't live there anymore, and the house is someone else's. It's still the house that I did tumbling passes in the living room, where I learned to bake, where my father passed away. It wasn't a special house, it wasn't fancy, and it sure wasn't luxurious, it was just a house that my mom did her best to make feel like our home. It's a house that holds a lots of memories for me, and will always be my home, in a way.

My home these days is a home I own, and as a grown-up, it's the seventh place I've lived. I lived for a year in the dorms at the University of Tampa, my alumnus, followed by a year in two different apartments with my then-boyfriend. I then spent a year (the only year!) on my own, in a tiny apartment near school, while I finished up my bachelor's degree. I moved across the complex the following year with my new boyfriend, who's now my husband. We lived in a townhouse after that first year together, which we then vacated early when we got our house.

We've lived in our house for almost six years now, and we've done a lot to it over these six years. New floors, new paint (twice because I once randomly decided to repaint because I was bored when Husband was out of town), new baseboards, lots of new. At the same time, there's still a lot of improving to do, and it seems as though we'll be here a while. Home improvement is something I don't particularly enjoy - I get frustrated real easily by it, and as a result, I desperately wanted a new house when we started looking for our first home. Obviously, I didn't win that battle, but it was a battle with our checkbook, not with Husband. Maybe our next home will be nicer. All I know is that it's ours, and after the history of moving I had growing up, that means a lot to me.

Wednesday, January 20, 2010

Best Buttermilk Pancakes

While Cook's Illustrated may have called these the Best Buttermilk Pancakes, I personally think that my IHOP Pancakes are better! These were still quite tasty, but they just can't compare. These compare to the Barefoot Contessa's sour cream pancakes recipe, and it's a similar flavor to the IHOP Pancakes, but the IHOP Pancakes are really just so awesome that they're aren't words for it. These are a good alternative recipe, if you've got some sour cream to use up.


Best Buttermilk Pancakes
adapted from Cook's Illustrated

2 cups unbleached flour
2 tbsp sugar
1/2 tsp salt
1 tsp baking powder
1/2 tsp baking soda
2 cups buttermilk
1/4 cup sour cream
2 large eggs
3 tbsp unsalted butter, melted and cooled slightly
1-2 tsp vegetable oil

1. Adjust oven rack to middle position and heat oven to 200 degrees. Spray wire rack set inside baking sheet with nonstick cooking spay; place in oven. Whisk flour, sugar, salt, baking powder and baking soda together in medium bowl. In second medium bowl, whisk together buttermilk, sour cream, eggs and melted butter. Make well in center of dry ingredients and pour in wet ingredients; gently stir until just combined (batter should remain lumpy with a few streaks of flour). Do NOT overmix. Allow batter to sit 10 minutes before cooking.
2. Heat 1 tsp oil in 12-inch nonstick skillet over medium heat until shimmering. Using paper towels, carefully wipe out oil, leaving thin film of oil on bottom and sides of pan. Using 1/4 cup measure, portion batter into pan in 4 places. Cook until edges are set, first side is golden brown, and bubbles on the surface are just beginning to break, 2-3 minutes. Using thin, wide spatula, flip pancakes and continue to cook until second side is golden brown, 1-2 minutes longer. Serve pancakes immediately, or transfer to wire rack in preheated oven. Repeat with remaining batter, using remaining oil as necessary.

Monday, January 18, 2010

Honey Chicken Stir Fry

I don't have a picture to show for this recipe, but what I do have is some full tummies. Husband and I very much liked this stir fry. Even Baby liked it, though he didn't love it quite as much as some of the other things I've prepared stir-fry-wise. This was super easy to put together, and definitely very flavorful as well. Makes a great weeknight meal. I served it over some fresh egg noodles, but rice would work just as nicely.

Honey Chicken Stir Fry

1 lb boneless skinless chicken breasts, cut into 1 inch pieces
1 garlic clove, minced
3 tablespoons olive oil divided
3 tablespoons honey
2 tablespoons reduced-sodium soy sauce
1/8 teaspoon salt
1/8 teaspoon pepper
1 16-oz package frozen broccoli or stir-fry vegetable blend
2 teaspoons cornstarch
1 tablespoon cold water

1. In a large nonstick skillet or wok, stir-fry chicken and garlic in 2 teaspoons oil. Add the honey, soy sauce, salt and pepper. Cook and stir until chicken is lightly browned and juices run clear. Remove and keep warm.
2. In the same pan, stir fry the vegetables in the remaining oil for 4-5 minutes or until heated through. Return chicken to the pan, mix well. Combine cornstarch and cold water until smooth; stir into the chicken mixture. Bring to a boil, cook and stir for 1 minute until thickened. Serve over rice or lo mein noodles.

Sunday, January 17, 2010

Menu Plan Monday for January 18th


It's finally warmed up around here, and I'm sad to see the cold go - at least at the moment, I am. I prefer being cold to being warm any day. Plus, you get to have awesome things like hot chocolate and hot soup when it's cold - those things are nowhere near as enjoyable when it's hot outside. And it's borderline hot here in Florida. Argh.

So, this week, I've got two new recipes in the works, and I'm still on the hunt for an awesome, moist yellow cake recipe to make for Baby's birthday next month. (If you think you've got that recipe, tell me, please!)

Tuesday - Apple Maple Chicken (a new recipe!)
Wednesday - Spaghetti and Garlic Knots (and I might just try to make my spaghetti sauce from scratch!)
Thursday - Meatloaf
Saturday - Burgers
Sunday - Soy Glazed Chicken and Onions (a new recipe!)

Need more menu inspiration? Check out Org Junkie's practically world famous menu planning roundup every Monday.

Friday, January 15, 2010

MSC: Coconut Cupcakes...or...Yellow Buttermilk Cupcakes with Dark Chocolate Frosting


Yikes. I so don't eat coconut. No offense intended, Jennifer from Cinema Cupcakes, our recipe selector for the month! The look of it totally creeps me out, and I'm not a fan of the taste either. When I first saw this on the list for this month, I thought, well, there's one cupcake I'm skipping. I hope I don't get kicked out! Then, I re-thought the situation, and realized that maybe I could make some creative substitutions and still participate. Perhaps I could make something really awesome by being creative.

Apparently I forgot that I'm me and my creativity in the kitchen tends to lead to disasters of epic proportions. Like when my friend Erin and I were 10 and decided that chocolate water was an awesome idea. Hershey's natural cocoa powder plus water, it had to be awesome...or not. So after coming up with a grand plan to make a white cake cupcake and decorate it with shavings of white chocolate that looked like coconut, I realized that there was absolutely no way I had time for something so labor intensive this month...so I made Martha's Yellow Buttermilk Cupcakes with Dark Chocolate Frosting instead. Yum! I had an ulterior motive for making these - I plan to bake some yellow cupcakes for Baby's 2nd birthday next month, and I'm searching for the perfect recipe. This wasn't it.

Don't get me wrong, they were yummy, but I didn't love the consistency of the frosting, nor did I really love the cupcake itself. The cupcake was a little bland, actually. I was quite disappointed. I have a feeling I'll be sticking with the America's Test Kitchen baking book recipe that I've had before, though I haven't posted it in the past. It's definitely much more flavorful and moist than this cupcake. Sorry Martha, this was one wasn't a hit for me! But it was pretty...


Thursday, January 14, 2010

Mama Kat's Writers' Workshop: What's in a Name...

This is my first time joining the all the wonderful who participate in Mama Kat's Writers' Workshop - I hope to make this a regular habit! Wish me luck!


Mama's Losin' It

This week, I picked the following prompt: What's in YOUR name? What does it mean? Why was it given to you?

Funny you should ask. My name is Elizabeth. That's my given name. It's the name my mother, for one reason or another, decided to give me upon my exciting birth. If I remember correctly, if I was a boy, I was going to be an Andrew.

But I wound up being an Elizabeth. A name destined to be shortened. How many Elizabeths do you know that actually go by the full name? How many toddlers can manage to spit that name out?

My sister, who's ten years older than me, decided on the day I was brought home from the hospital that I ought to be called Beth. The way the story is told, she called me Beth for the first month or so of my life. My mother didn't like the name Beth. Somehow, my mother came up with the nickname Betsy. They loved the name. Thought it was the cutest thing ever. I remember despising the name...pretty much all of my life.


Do I look like a Betsy? I don't think so..

In first grade, I told Miss Mayer, my teacher, that I didn't like the name Betsy. Didn't like it one bit. She suggested that I try the name Liz. It stuck. At least outside of my household, it stuck. My family never liked the name, and to this very day, they still call me Betsy. A name that makes me feel like one of two undesirable things: a cow or a six-year-old. Problem with Liz is that people tended to make up mean nicknames around the name - Lizard, Thin Lizzy (which was the total opposite of what I was), and so forth. I didn't really love that name either. Then again, whenever some of the mean kids in school learned that I'd once been called Betsy, the teasing grew to a feverish pitch, calling me Betsy the Cow (apparently there was a famous Betsy the Cow at some point) and Betsy-Wetsy, amongst other things.

It wasn't until college and then when I began my professional career that I returned to using the name my mother first gave me - Elizabeth. I like the name, for the most part. It sounds classy. It makes me think of Elizabeth Taylor, so in a way, it's a little glamorous feeling to me. Liz just doesn't quite feel like me, though I can't quite explain it. My husband and many of my longterm friends still call me Liz, and that's okay, I suppose - it's better than Betsy, that's for damn sure. I imagine I will spend the rest of my life going by all three of the names I've possessed throughout my twenty-nine years.

Funny story about the whole Betsy thing - I did a breast cancer walk with some friends of mine last year, and my husband came with us. He managed to chat up one of my friends, and told her, for whatever reason, that my family calls me Betsy. This wasn't really public knowledge with some of my friends, prior to that. It wasn't that I didn't want them to know, it was more that it just hadn't come up. One thing led to another, and she teased him about his having told a secret of mine. That drove me crazy, and I demanded he tell me what "secret" he told her. After much physical violence and silly threats from me, he confessed, and it became a big, silly thing to laugh about. I guess, in a way, I've come to terms with the name, but I still cringe a little when I hear my mother say it. I probably always will.

Needless to say, when my son was born, I agonized about naming him. I had spreadsheets full of names and the initials those names would lead to, along with possible nicknames. I didn't want him to teased for some silly nickname of his name, so he has a name that's pretty difficult to create a nickname for.

Want to join Mama Kat's writing workshop? Visit her blog, Mama Kat's Losin It, on Tuesdays to find several prompts to choose from. Pick the one that moves you, and post your prompt on Thursdays.

Wednesday, January 13, 2010

Yeasted Overnight Waffles

As you've probably noticed from my Menu Plan Monday posts, we have Brinner on Monday nights. Growing up, my mom would often make waffles for dinner or eggs and bacon, especially on nights where my dad was working and it was just the two of us. There's something especially comforting about having breakfast for dinner. It's the epitome of comfort food in my opinion. It's quite possibly Husband's favorite day of the week because he loves brinner so much.

On occasion, I get a wild hair that causes me to try a new recipe for brinner, but more often than not, I come right back to the recipes I know and love. This was one of those times. It's not that we disliked the recipe, it just didn't taste any different than the regular waffles that I make. And while having the batter all ready to go was kind of handy, it only takes a few moments to put the batter together in the first place, so I think I'll stick with my regular recipe for waffles.


Overnight Yeasted Waffles
adapted from America's Test Kitchen Family Cookbook

1 3/4 cups whole milk
8 tbsp unsalted butter, cut into 8 pieces
2 cups all-purpose flour
1 tbsp sugar
1 1/2 tsp instant yeast (but not dry active yeast)
1 tsp salt
2 large eggs, lightly beaten
1 tsp vanilla extract

1. Heat the milk and butter in a small saucepan over medium-low heat until the butter is melted, about 4 minutes, then let cool off the heat until just slightly warm. Whisk together the flour, sugar, yeast and salt in a large bowl, then gradually whisk in the warm milk until smooth. Whisk in the eggs and vanilla until fully incorporated. Scrape down the sides of the bowl, cover with plastic wrap and let refrigerate for at least 12 and up to 24 hours.
2. Heat the waffle iron according to manufacturer's instructions. When the waffle iron is hot, remove the batter from the refrigerator (the batter will be foamy and doubled in size) and whisk to recombine and deflate. Spread the appropriate amount of bater onto the waffle iron and cook until golden brown, about 3 1/2 minutes. Repeat with the remaining batter, serving the waffles immediately or holding them in a 200-degree oven until all are cooked. You can place the waffles on a wire rack set over a baking sheet and cover them with a kitchen towel, in a 200-degree oven to keep them warm. When the final waffle is in the iron, remove the towel and allow the waffles to crisp for a few minutes.

** NOTE: Do not substitute lowfat or skim milk in this recipe - it will not work!

Monday, January 11, 2010

Beer and Brown Sugar Marinade


I like red meat. It just screams "dinner" to me. Chicken's okay, don't get me wrong, and I like fish, but for some reason they don't say "dinner" in quite the same way. I can't quite explain it, but there's something about having a hunk of steak for dinner that just feels good. As you all probably also know, I'm a big fan of teriyaki. Love it. My steak teriyaki is one of my favorite meals, both to eat and to prepare. When I spotted this recipe on Allrecipes.com, I couldn't skip over it, I had to print it out to try it. The only change I made was doubling the marinade ingredients, and it was definitely a super yummy meal, and quite easy to put together. So thank you, Craig Jones, wherever you are, for this one, it's awesome.


Beer and Brown Sugar Steak Marinade
adapted from Allrecipes.com, courtesy of Craig Jones

2 16 oz beef sirloin steaks (I used thinly sliced NY Strip steaks, and they were awesome)
1/2 cup dark beer
1/4 cup teriyaki sauce (I used some of my own teriyaki sauce)
1/4 cup brown sugar
1/2 tsp seasoned salt (think Lawry's)
1/2 tsp black pepper
1/2 tsp garlic powder

1. Preheat grill, or grill pan on stove, for high heat.
2. Use a fork to poke holes all over the surface of the steaks, and place steaks in a large baking dish. In a bowl, mix together beer, teriyaki sauce, and brown sugar. Pour sauce over steaks, and let sit about 5 minutes. Sprinkle with half of the seasoned salt, pepper and garlic powder; set aside for 10 minutes. Turn steaks over, sprinkle with remaining seasoned salt, pepper and garlic powder, and continue to marinate for 10 more minutes.
3. Remove steaks from marinade. Pour marinade into small saucepan, bring to a boil and cook for several minutes.
4. Lightly oil the grill grate. Grill steaks for 7 minutes per side, or to desired doneness. During the last few minutes of grilling, baste steaks with boiled marinade to enhance the flavor and ensure juiciness.

Sunday, January 10, 2010

Menu Plan Monday for January 11th


These past few days have been way busy in my kitchen, but not because of any cooking or baking - Husband has been attempting to install our new kitchen and dining room floor. It was apparently a bit more of a challenge than he anticipated, since it's not done yet, after three days of work, but at least I can use my stove again. Yay! Here's what's on the menu for this week...

Monday - Brinner - Best Buttermilk Pancakes (a new recipe!)
Wednesday - Spaghetti
Thursday - Beef Teriyaki
Sunday - Pan Roasted Chicken with Onion and Ale Sauce (a new recipe!)

I've got several new recipes to post this week, including one that is definitely going to make it into my regular rotation - Beer and Brown Sugar Marinated Steaks. Keep your eyes peeled for that one, and don't forget, if you need menu inspiration, visit Org Junkie!

Friday, January 8, 2010

Plan B by Jonathan Tropper


I've been reading a lot of Jonathan Tropper lately. I'll admit it. I really enjoyed This is Where I Leave You so much that I've purchased his entire bibliography of works. I have not yet enjoyed one of them as much as This is Where I Leave You, however they all have been enjoyable in their own way, just not as amazingly perfect as that one book.

This was a perfect book for me to read, here at the start of my 29th year, the last year of my twenties. Plan B is the tale of four friends from college who are all now 29 or recently 30 and coming to grips with not being the person they thought they would be at 30. It caused me to ask myself a lot of questions -like who did I want to be when I was 30? Am I happy with the person I am here, on the verge of 30? I'm still pondering a lot of these questions.

As usual, the characters were very real and their dialogue was extremely well-written. I have a hard time understanding why no one has purchased this book to turn into a movie, it would make a good one, especially given some of the subject matter in the book - though I won't give it away.

I will definitely recommend this book, although I wouldn't call it a 5 Star book. It was definitely a good read. Next, I'm re-reading The Help by Kathryn Stockett for my book club, which I'm very much looking forward to.

Wednesday, January 6, 2010

Orange Honey Glazed Chicken


This was definitely a tasty recipe, though quite similar to the Crispy Skinned Orange Chicken I made not that long ago. This had its differences, from the lengthier prep time and cooking time, for instance. I also used boneless chicken breasts rather than bone-in, skin-on split breasts, but I think it worked out just as well this way. Husband definitely preferred the Crispy Skinned Orange Chicken recipe, but I thought this was quite good. It would make a good recipe for company, since all you do is take the chicken out to rest and finish off the glaze in order to put it on the table.

Even Baby finished every bite of this that we put in front of him, and he sure has gotten picky these days. I'd definitely say this met with his seal of approval.


Orange Honey Glazed Chicken
adapted from Cook's Illustrated
Printer-friendly recipe

1 1/2 cups orange juice plus an additional 2 tablespoons
1/3 cup light corn syrup
3 tablespoons honey
1 tablespoon Dijon mustard
1 tablespoon distilled white vinegar
1/8 teaspoon red pepper flakes
1/2 cup all-purpose flour
4 bone-in, skin-on chicken breast halves (about 12 ounces each), ribs removed, trimmed of excess fat and skin (see note above)
2 teaspoons vegetable oil
1 medium shallot , minced (about 3 tablespoons)


1. Adjust oven rack to middle position and heat oven to 375 degrees. Whisk 1 1/2 cups orange juice, corn syrup, honey, mustard, vinegar, pepper flakes, 1/8 teaspoon salt, and 1/8 teaspoon pepper together in medium bowl. Place flour in pie plate, then season chicken on both sides with salt and pepper. Working with one chicken breast at a time, coat chicken with flour, patting off excess.

2. Heat oil in ovenproof 12-inch skillet over medium heat until shimmering. (NOTE: Don't have an ovenproof skillet? Brown the chicken breasts and reduce the glaze as instructed, then transfer the chicken and glaze to a 13 by 9-inch baking dish and bake and don't wash the skillet. When the chicken is fully cooked, transfer it to a plate to rest and scrape the glaze back into the skillet to be reduced.) Add chicken breasts skin-side down; cook until well browned and most of fat has rendered from skin, 8 to 14 minutes. (If after 3 minutes you don't hear definite sizzling, increase heat to medium-high. If after 6 minutes chicken is darker than lightly browned, reduce heat slightly.) Turn chicken and lightly brown other side, about 5 minutes longer. Transfer chicken to plate.

3. Pour off all but 1 teaspoon fat from pan. Add shallot and cook until softened, 1 to 2 minutes. Increase heat to high and add cider mixture. Simmer, stirring occasionally, until syrupy and reduced to 1 cup (heatproof spatula should leave slight trail when dragged through glaze), 6 to 10 minutes. Remove skillet from heat and tilt to one side so glaze pools in corner of pan. Using tongs, roll each chicken breast in pooled glaze to coat evenly and place skin-side down in skillet.

4. Transfer skillet to oven and bake chicken until thickest part of breasts registers 160 degrees on instant-read thermometer, 25 to 30 minutes, turning chicken skin-side up halfway through cooking. If the glaze looks dry during baking, add up to 2 tablespoons of juice to the pan. Transfer chicken to platter and let rest 5 minutes. Return skillet to high heat (be careful, use an oven mitt - handle will be very hot) and cook glaze, stirring constantly, until thick and syrupy (heatproof spatula should leave wide trail when dragged through glaze), about 1 minute. Remove pan from heat and whisk in remaining 2 tablespoons orange juice. Spoon 1 teaspoon glaze over each breast and serve, passing remaining glaze at table.

Monday, January 4, 2010

Double Fudge Cookies


As I mentioned before, I grew up loving Great American Cookie Company's cookies. In the last six months or so, they've disappeared from my local malls, and I've been left missing their cookies desperately. Last week, I attempted a chocolate chip cookie knock-off, but I had actually thought it was a knock-off of their double fudge cookies, which were my personal favorite. That's what happens when you really want something and you read (and print) a million recipes, and try to put something together that's missing an integral ingredient (namely cocoa powder). When I started to make these cookies, I re-read the ingredients I had written out three or four times to make sure I had it right this time.

If I do say so myself, these are some awesome cookies. Fudgy, just gooey enough, with a little bit of crunch around the edges and tons of chocolate flavor. Very, very tasty. And look, aren't they pretty? Husband helped out with this lovely shot of these cookies, and I must say, it's probably one of the best food photos I've taken thus far in my completely amateur food photography experience. I'm learning!


Anyway, do yourself a favor. Make these cookies tonight. Just make sure you've got lots of milk on hand, because this is definitely a cookie that requires some milk to go along with it.

Double Fudge Cookies (like at Great American Cookie Company)

1 cup unsalted butter, softened
1 cup light brown sugar, firmly packed
1 cup granulated sugar
2 eggs
2 tsp vanilla
2 3/4 cups all-purpose unbleached flour
1/2 cups cocoa - dutched is better, but natural is OK too - I ran out of Dutched and used half of each
1 tsp baking soda
1 tsp baking powder
1/2 tsp salt
2 cups semisweet chocolate chips (or bittersweet or milk - whatever floats your boat)

1. Preheat oven to 350. Cream butter and sugars until fluffy and pale yellow in color.
2. Beat in eggs and vanilla until well combined.
3. In a separate bowl, mix dry ingredients together, and add slowly to batter. Mix well.
4. Add your chocolate chips and mix well.
5. Either scoop dough in heaping tablespoons or roll into large balls and place approximately 3 inches apart on a lightly greased (or Silpat'd) cookie sheet. Before you put them in the oven, flatten them with either your fingers or the bottom of a drinking glass, much like you would a sugar cookie. This ensures the big, mall cookie appearance.
4. Bake at 350 for 9 minutes. They will look underdone, I know, but they aren't. Let them cool on the cookie sheet for approximately 5-8 minutes, then move gently onto a wire rack to finish cooling.

Sunday, January 3, 2010

Menu Plan Monday for January 4th

Happy New Year to you all! I am excited about the new year, and I'm excited about this week's menu. Last week was nice and I'll be posting three new recipes I tried out this week, including a new Double Fudge cookie recipe (yum!), but I'm super excited to try a new recipe for brinner.

Monday: Yeasted Overnight Waffles (a new recipe - stay tuned!)
Wednesday: Spaghetti and Garlic Knots
Saturday: Honey Chicken Stir Fry (a new recipe - stay tuned!)
Sunday: Beef and Broccoli Stir Fry (a new recipe - stay tuned!)

So tell me, what are you making this week? Don't forget, Org Junkie has the market cornered on menu inspiration if you're in need of some. Happy menu planning!

Saturday, January 2, 2010

Happy New Year!


New Year's is always a little bittersweet for me. I hate taking down all the pretty Christmas decor and packing it away for next year. The house always looks so blah without the pretty, sparkly bells and lights and things. I'm not much of a decorator for Valentine's Day, but I did budge and buy two cute little things from Target recently to put up. All we have left to take down is our Christmas tree, and I'm a bit afraid of Baby's reaction to that. He's already quite miffed that many stores have taken down their Christmas decorations and that we've started to. If only I could explain it in a way that would make sense to his little 22-month-old brain.

The other thing that's bittersweet to me about New Year's is the whole concept of making resolutions. I've never really met anyone who stuck to their New Year's resolutions, and I've never been very good at making them myself. I've always been a very goal-oriented person, and I still am. If I make a goal, I usually try pretty darn hard to stick to it. But for some reason, New Year's resolutions just never quite work out for me. Maybe I'm too ambitious with them. Maybe I set my sights too high.

There's definitely some things I want to accomplish this year. I turn 30 next December, and that's got me mildly freaked out. Not hugely freaked out, because age really is just a number in my book, but I keep remembering a friend of mine that I grew up with having a total breakdown at a party in high school when she realized she was 15, because eek, that was halfway to 30. Part of me feels like I ought to be melting down about this milestone. Fact of the matter is, I think I've felt 30 for a long time. I had a ridiculously crazy period of years in my late teens and early twenties that got all of the wild and crazies out of my system. Then I felt old. Husband says he's felt old (i.e. 30) since we bought our first appliances, a washer and dryer, when we were 24.

I think the morale of the story here is that this is possibly a big year for me, and as such, I do want to accomplish some things. I'm going to call them my 2010 goals. Not resolutions. Goals. Maybe my brain likes this word better. And I'm not going to write 30 of them, as I'd originally intended (you know, a super cute 30 things to do before I'm 30), because that feels like a lot of things to do, and I'd really like at least a remote chance in hell that I might do all these things. I'm even going to try to figure out how to post these somewhere on my sidebar so I see them every day, so I don't manage to forget about them, as I have in the past.

So, here we go, my official 2010 goals are:

* Move to WordPress. I was going to buy www.typeamommy.com, but someone else owns it (and has for a year and has done absoutely NOTHING with it - ARGH!). So I have to come up with a new domain name (ideas anyone?), but I really want to do this. Peer pressure, I suppose.

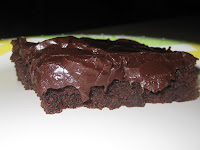
* Get posted on Tastespotting or FoodGawker. I'm really avidly trying to improve my photo skills (check out my blog later this week for some double chocolate chip cookies - I'm definitely making strides in the photo department!)

* Purge my closet. I really need to do this. Not only of my clothes, but of all the other random things in my closet, like the bow bouquet that was made for me at my wedding shower.

* Do Jillian Michael's 30 Day Shred program at home, now that I've lost my personal trainer (boo, she's out of the training business and instead owns her own tea and spices shop) - I actually started this yesterday!

* Make Baby something non-food related. I'm planning to sew him a blanket for his birthday, with some serious help. He loves Yo Gabba Gabba, and Muno in particular, so I'm going to sew him a flannel blanket with Muno's face on it.

* Do NaNoWriMo in November. And try before then, too. I've wanted to do NaNoWriMo ever since I heard about it several years ago, and every year, I put it off. If I ever want to try to be a real writer, I need to give this a shot.

* Make a peanut butter pie for Husband. He watched a TV special about restaurants in my hometown, including Yoder's, an Amish restaurant known for their pies, and has been silently begging me to make one ever since. It's not my cup of tea, but sometimes it's nice to make things for other people. (Note: only sometimes.)

* Make bread from scratch. I make lots of cakes and cookies, but not much in the way of bread. I want to explore this year breadmaking, in part because of my totally kick-ass new mixer, but also because I really like bread.

* Read a classic I avoided in high school and/or college. I was thinking of The Great Gatsy, but I'm not 100% on it yet. I'm still racking my brain (and bookshelves) to see what classics I haven't read. I'd love to say I'll read them all, but seriously. There's probably a decent reason why I skipped most of them.

* Get into a non-plus size pants size. For real. I'm almost there. I know I can do it. And I know the cookies I bake don't necessarily help, but I've never been one to believe in starvation diets. Moderation is the key. Don't eat 10 cookies, eat 2. Sometimes I'm good at that, sometimes I'm not, but having sweets in the house keeps me sane. Take my chocolate fix away, and it's just not pretty what happens next.

* Make real tiramisu. Yes, another goal that benefits someone else. Yes, the tiramisu cake was ridiculously awesome, and I think I might just be sainted in Husband's eyes now as a result, but it's time to stare my baking fears in the eye and climb over them. Really, it can't be that hard now that I've made the tiramisu cake.

* And finally. Make another baby. I think it's about that time. Even my insurance is going to be on board with that this year. Part of me would love to just have Baby, by himself, because I adore him so much, but I know I want to have more than one child, and I know I don't want my children to be too far apart in age, so I guess the time has come to expand.

So, tell me, what about you? What are your goals for 2010?
Related Posts with Thumbnails